Wasabi.
Do you love it, or hate it?
I just happen to love it. I love horseradish too, but I guess that's no surprise as they are in the same family. Horseradish with roast beef, corned beef, smoked trout; wasabi with sushi,with spinach, and of course wasabi peas for snacking on!
Kath, from has asked some of her fellow bloggers to do a Japanese recipe post to link in with her solidarity with Japan. http://myfunnylittlelife.com/category/kaths-stuff/solidarity-with-japan/ I thought of sushi, miso, teriaki, but then....... my thoughts headed in another direction.
I have been fighting it, I don't like to follow trends, I like to forge my own culinary paths, but .. but.. 'But all the other chefs are doing it' I justified. And so, ashamed, I did it, I caved into peer pressure. I had to see for myself what all the hype was about. The Macaron. They're everywhere at the moment, Master Chef has been promoting them, they're in every magazine, everyone is blogging and flogging them. And now , I too, have joined the darkside. Please forgive me. My excuse is that it's in a good cause, and if it had to be done, I might as well do it in style.
Thus was born the Wasabi Pea Macaron.
Now, there are amazing tutorials all over the internet and magazines and blogs and cooking shows, etc, etc, etc. So I'm just going to give you a quick rundown of my cheaty little sneaky way of making them using leftover meringue.
Every time I do a big bake for one of my clients I have extra Italian Meringue. Although it's very yummy, I usually wash it down the sink or feed it to my walking garbage bin, aka, the dog. This week I saved it for making my macarons instead.
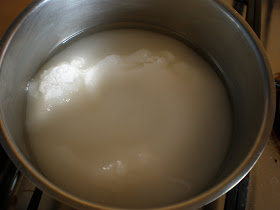
I make my meringue the easy way, with no temperature testing. I just use 5 cups of sugar to 1 1/3 cups of water with a pinch of cream of tartar. I put this on high heat on the stove and bring it to the boil. I watch it, and as soon as the liquid is clear not cloudy, I pull it off and tip it slowly into 10 egg whites in the Kenwood as it runs at low speed. Once the sugar syrup is in, I increase the speed to high and beat it until it's shiny and holds a really good peak. That's it. The only thing to watch for is that the saucepan has no sugar above the water level or it might crystallize. I don't know how much this makes to be honest, it tops 4 dozen small lemon meringue pies, and there was 3 1/2 cups left over.
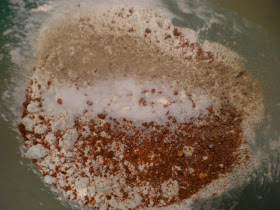
The other important part of a macaron is the TPT. This is equal weights of pure icing sugar and ground almonds sifted together. I still needed to get my wasabi peas in there, so I ground them up in my food processor. As you can see in the finished product, I should have gone a bit finer, they're not as smooth as they should be, but this was only a guestimate recipe this time round so I wasn't too fussed.
I mixed equal quantities of TPT and ground peas together, a cup of each, and sifted them. This was then folded with the 3 1/2 cups of meringue until well combined with no streaks of white showing. Pipe this into rounds on baking paper lined cookie sheets.
I then wet the top of each macaron and sprinkled them with some funky little wasabi flavoured sesame seeds I found at the asian supermarket and have been saving for something special. Leave these on the bench for about an hour to develop a skin, and so you can get the little ridge, or 'feet' to the macaron. Be careful putting the sheet in the oven, because if you just push it in the macarons can slip and not rise straight up and pretty.
Bake for 15 mins at 150*.
Leave to cool on the paper, then carefully peel off.
I sandwiched these little cuties together with a white chocolate ganache made from melted Sweet William white chocolate, a bit of butter, and a teaspoon of water. Sweet William is not really 'chocolate', rather a dairy, gluten and nut free substitute. Never mix water and genuine chocolate together like that it will seize up and be a waste of yumminess!
Well Readers, here are my cuties. They are posed with some of littlej's paper cranes. littlej is studying Japanese at school, and so has been following all the developments closely. As the class was discussing the disaster, littlej came up with the sweet idea of them all making as many paper cranes as they could to take to the Japanese embassy to show how much they care. The lovely teacher jumped on the idea and they dropped them off the following day. I know it's not much, but sometimes just knowing others are thinking of us in times of need can help us get through the day.
So what do you think Readers, would you like to try a Wasabi Pea Macaron?
Tolerate: to allow;exist or occur without interference. Intolerance: unable or indisposed to tolerate; unwillingness to recognise and respect
Pages
▼
March 28, 2011
March 19, 2011
Bestest Brownies
These brownies are dedicated to Celia from figjamandlimecordial who came up with the original recipe which she developed for her friend Pete, who is a coeliac.
http://figjamandlimecordial.com/2011/02/16/gluten-free-chestnut-brownies/
A while back the clever Celia posted about her delicious gluten free brownies that she made that were to be a fantastic Brownie in their own right, not just an OK substitute for 'normal' ones. So often us InTolerants are left out, and end up with the fruit plate or something else not quite as exciting as the 'normal' dessert options.
I love Celia's recipes so I made these, and guess what, they WERE fantastic! I played around with the recipe just a bit by putting some cherries in the bottom of the dish, and serving them with some vanilla ice cream with caramelised cherry balsamic vinegar swirled through. WOW! I also served up some cherry wine on the side for sipping, and I assure you dearest Readers, I was one happy little chef.
As you can imagine, any good brownie should be slightly gooey and incredibly rich. As such having leftovers is to be expected and I either freeze them or share the love by scattering them around at work. It always surprises me that these other chefs are astonished when presented with a great gluten free dessert. I'm astonished that they're close minded enough to be astonished in the first place! Needless to say, they all loved them.
This led to a discussion about InTolerance cooking in general, and how hard it was - in their minds- to cater for it. The others thought that dairy free would be the hardest to deal with, but I decided to set them straight. I had to use the brownie as my example, they had all just tasted it to rave reviews, so they would have something to compare my dairy free one to as well.
1/2 cup of oil, use hazelnut, ricebran or nut or neutral flavour
250g Sweet William Chocolate, It's dairy, gluten and nut free
3/4cup sugar
1 teaspoon vanilla extract
3 eggs
1/4 cup chestnut flour, if you have nut issues, use a plain gfree blend
1/4 cup of good quality cocoa powder
1/2 cup of raspberry jam
3/4 cup or so of raspberries
1. Preheat oven to 175*C
2. In a medium saucepan, place the oil and chocolate and stir over low heat until melted and smooth. Take off the heat and stir in the sugar and vanilla until combined.
3. Stir in the eggs one at a time. Sift in the chestnut flour and cocoa all at once and stir until you can feel the mixture go stiffer and get nice and shiny instead of grainy
This is how Celia describes it "The batter starts out grainy and fairly loose. As you beat it by hand, it will initially feel like nothing is happening, and then it will suddenly feel a bit stiffer – that’s when you’ll know a state change has occurred. This might take one minute, or it might take several. Stop occasionally to check how it’s going. Unlike true fudge, it’s not a huge “snap”, but the texture will definitely change noticeably – it will feel stiffer, look smoother, and pull away from the sides and bottom of the pan."
4. Tip and smooth about half the batter into a lined pan. Scatter the raspberries on top and dollop on some of the jam. Put the rest of the mixture on, dollop on the rest of the jam and 'swirl' it through the top layer with a skewer. Smooth the top.
5. Bake for 25 minutes until just firm. I let the brownies cool overnight in the fridge before trying to get them out and slice them. They are very sticky and waay to gooey otherwise. Once sliced, let your brownies come back to room temperature before eating them. This way you get the most out of all the fantastic flavours.
And what did my fellow chefs think?
"Yum, yum, yum, yum, yum! "
They were even more blown away with this recipe. The result was to whet some appetites and hopefully open some minds. You can have great results without using any gluten or dairy at all. or compromising on flavour or texture.
Some of the boys bravely came back for seconds, something you may or may not choose to do, based on whether or not you love a good sugar rush!
So dearest Reader, do you have any great tips for InTolerant cooking?
March 13, 2011
Sweet Chilli Calamari
Deep fried crumby rubber bands.
Languishing in the greasy tray of the local chippie. Sprinkle them with some chicken salt, and chew and chew and chew.
Sadly that's the only experience some people get with this little cephalopod, but it is really so delicious and tender. You just need to treat it right.
The secret to cooking squid or calamari is to cook it very fast, or very slow. There is nothing in between.
If you find a whole squiddy thing daunting, just go ahead and buy the clean white tubes at the supermarket. They won't be as great, but I promise I won't tell anyone (in fact, the market had no whole squid today, so that's what I had to use too. Shhh...)
Slit the tubes open and lay them flat on the chopping board, with the inside facing you.
Take a nice sharp knife and score the flesh in little diagonal cuts nice and close together. Don't cut all the way through though. Turn the board around and do the same again in the opposite direction. You should now have a pretty little diamond pattern all over the inside of the tube. Cut them into strips about the size of two fingers in length and width.
Prepare some seasoned flour by mixing some rice flour, szechaun pepper, black pepper and salt together to taste. Now dip or shake each piece into it and make sure it's nicely covered. This will help protect it from overcooking, give it a nice tasting coating, and help to thicken the sauce as well. Don't try and do this in advance, leave it until the last minute or the flour will go soggy and not crisp up well.
Get your fry pan nice and hot, then add in about a tablespoon of oil.
Put in the pieces scored side down, adding just enough to cover the bottom of the pan. It's OK if you need to do a few panfuls, just don't crowd it. As soon as they just start to curl up, pull them out and set aside. Keep going until all your pieces are done.
Pour a good glug of dry white wine into the hot pan. This will deglaze it and remove all the yummy bits from the bottom. Let it come up to the boil to remove the alcohol, them add maybe a quarter of a cup of Thai Sweet Chilli Sauce and a tablespoon of hot chilli sauce as well. Let it bubble for a minute to combine, then put the squid back in the pan and toss through the hot sauce.
At this stage I like to add in some small diced capsicums and blanched snowpeas for a bit of crunch and colour. Tonight, as you may have noticed, I had neither, but it is prettier with them in.
The calamari will quickly start to curl into pretty little tubes and the residual flour coating will thicken the sauce. Pull it off the heat, this means it's done. Don't let it stew away in the sauce or it will go tough and chewy, remember- we want it buttery soft and tender.
Serve this immediately with maybe some rice or a salad.
So tell me Readers, do you find tackling a whole squid tricky?
March 7, 2011
Confit Salmon
Have you heard about Macadamia Oil?
Macadamia oil is a delicious buttery, mild tasting oil that is mostly monounsaturated and low in the damaging saturated fats. This means it's healthy and you can eat lots of it!
When I got my package of yummy Brookfarm products recently, there was a bottle of Chilli Lime infused Macadamia Oil. It has a light nutty flavour that lets the chilli and lime through beautifully. It's great for salad dressings, drizzling over meats and even stirfrying as it has a high smoke point and won't burn easily.
Today I'm going to try something a little different, I'm going to use it to confit a salmon steak.
Confit is cooking something gently in oil or fat; it leaves the meat beautifully soft and delicate as the indirect heat wraps around it and seals the salmons natural moisture in. Don't be afraid of the oil. The fish won't soak it up or be unpleasant, it will drain off at the end and just leave a lovely lingering flavour.
I'm going to serve it with a green pawpaw salad for a great textural contrast, and some rice to complete the meal.
I got a lovely piece of salmon for my recipe. I left the skin on the fillet to help it hold together as it cooks and to protect it in case the bottom of the pot got a bit too warm. I also trimmed the thin end off as it would cook a lot quicker than the thicker part.
Place the salmon in a small pot and add enough olive oil to almost cover. Top up with a quarter cup of lovely Macadamia oil and leave to infuse while you make the salad.
For the green paw paw salad, or you can use green mango instead, use a shredder tool that you can get from most cookware shops or asian grocers. This finely shreds hard vegetables so easily and quickly, that it's well worth investing the $15 or so in getting one.
Green Papaya Salad
3 handfuls of shredded green papaya
2 handfuls of shredded carrot
about 1 handful of green beans cut into batons
about 10 cherry tomatoes
2 garlic cloves
1 large chilli
1 tab raw or palm sugar
2-3 tab lime juice
same amount of fish sauce
In a mortar and pestle, crush the garlic and sugar into a paste. Add in the chilli and bash away. Now add the beans and bruise, but don't smash. The idea is to use a hit and scoop action. Hit the vegetables with the pestle with your right hand, then scoop them up and turn them over with a spoon in your left hand. It's not as hard as it sounds, and you get a good rhythm going. Next add the papaya, then carrot. Lastly add the tomatoes, then the juice and fish sauce. Pound lightly a few more times to crush the tomatoes and to mix their juices and the other liquids through the salad.
Put the salmon on a gentle heat and slowly bring up the temperature. It should be just a bit too hot to leave your finger in comfortably. Place a lid on the pot and pull off the heat and leave for about 5mins to finish cooking. If there is only just enough oil, you can turn the fish over carefully first to make sure it's covered completely.
When the salmon is ready, put it on a rack over a tray to drain off the excess oil. You can also pat it gently with some paper towel if you like.
Now to plate up.
Remove the skin from the bottom of the fish, it's done it's job and isn't needed now. Yucky soft skin isn't pleasant at all. The fish is nice, soft and moist, with the subtle hints of lime and chilli just coming through. You can serve this hot or warm, I prefer it warm as I think the flavour is much better.
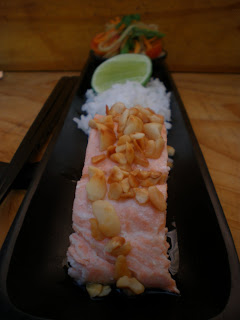
Place on a plate with the salad and rice. I topped this all off with some toasted macadamia nuts and a tiny last drizzle of fresh macadamia oil.
March 1, 2011
A Delicious Recipe
I love recipes.
I have several hundred cookbooks, I research recipes online, I watch cooking shows on TV, and I subscribe to just a few cooking magazines.
One of these happens to be Delicious. Well yes, the recipes are, but I mean the name of the publication is Delicious.
I haven't even got to the end of it yet this month, because the pages are folded over at page 27, showing a beautiful looking Polenta and Apple Cake with Muscatel Syrup. This is recipe from Andre Ursini, from the last series of MasterChef. He's opened a Cucina and Polenta Bar in Adelaide, with a menu Matt Preston describes as 'full of simple but intelligent Italian food.'
One of the things that caught my eye was the use of polenta instead of flour. How handy for me! Also there was no dairy except butter, which I can handle, but how easy to swap it out for non dairy fats as well. Perfect for my recipe collection!
Of course, I used the ingredients I had at home substituting here and there where needed. The original recipe required lemon rind and juice for the cake- I used orange. The syrup needed muscatels - I used dried prune chips, they are rich and sweet and just lovely with the cake.
Never worry about changing a recipe around to suit your tastes, pantry or budget. The finished product should still be pretty close if the flavours are similar, and this way you are more likely to try it then putting it off until you get that ridiculously expensive ingredient that you can only buy by the kilo, and you only need 1/3 cup anyway!
Here is my version of the recipe, for the original, go buy the latest edition of Delicious magazine, there are heaps of other yummy recipes too.
Polenta and Apple Cake with Marsala Plum Syrup
200g butter/ non dairy fat
165g caster sugar, plus 1 tbs extra
3 small granny smith apples, peeled and grated
3 eggs
1tsp vanilla extract
1/2 orange juiced and zested
1tsp gf baking powder
120g instant polenta
1. Place 25g butter , the 1 tb extra sugar and apples in pan. Cook, stirring over med high hat for about 8 mins or until apples are soft and liquid has evaporated. Cool to room temperature.
2. Grease and line a 18cm round cake tin. I only have a 20cm, so my cake is a bit flatter than it should be.
3. Beat 175g butter , 165g sugar and a pinch of salt until light and fluffy. Add the eggs, one at a time, beating in well after each. Add the stewed apples, vanilla and lemon zest and juice, but don't stir yet. Sift over the polenta and baking powder and beat on low speed until combined.
4. Spoon into the pan and bake at 180* for 35-40 mins or until you get a clean skewer test.
Cool on rack.
Syrup:
200g prune chips
150g caster sugar
125ml marsala
60ml espresso coffee
1 cinnamon stick
1 vanilla bean- split and scraped
1 orange, zest peeled into wide strips
Place all ingredients in a pan over high heat. bring to a simmer, then cook for about 10mins or until liquid is syrupy. Cool down and dig out cinnamon and vanilla.
Spoon over the cake and enjoy!
I really enjoyed this recipe. Despite the extra couple of steps, it didn't take too long or too much effort either. The cake itself is really moist and yummy and with a rich buttery flavour. There is a tiny bit of 'grittiness' at the top of the cake that I find common to all polenta cakes. Maybe I'm doing something wrong, but it certainly doesn't spoil the flavour factor at all.
The syrup is certainly very rich indeed. The fruit is almost jammy and sticky and the cinnamon isn't too strong. The only thing is that I think I prefer the syrup on the side, not all over the cake, as it almost overpowers the more subtle flavours from the apple. Some cream, mascapone or vanilla icecream would be perfect with this and make it even more Delicious if that's at all possible!
So Readers, do you subscribe to any Cooking Magazines, and do you ever substitute ingredients?