February 21, 2013
Great Aunt Daisy's Grape Cake
My Great Aunt Daisy died recently
She lived a lovely full life, and was quite a notable cook in the family with many of her recipes reaching near legendary status.
As part of her Life Celebration, family members were given a page of her favourite recipes including her handwritten notes on the side. What a lovely memorial, the idea that her legacy of culinary love can be shared and preserved for future generations. I was so excited to read through these, and also very honored to be able to share them with my own family, and also with you Dear Readers.
Usually I can get a feel for a recipe and a have a good idea of how it's going to turn out by reading it through, but I just couldn't nut out one of these cakes- and that really intrigued me.
It was simply called Grape Cake, and with a list of just 6 ingredients including fresh grapes and an egg, it called for 5 of them to be boiled up together before baking.
I just had to make it!
There was also only minimal instructions for this cake, as most people of our grandmothers era had at least a basic grasp of cookery skills in the days before most mass-produced markets, so I've tried to expand it a bit to make it simpler to follow. Let's hope Aunt Daisy would have approved.
Great Aunt Daisy's Grape Cake
Converted to metric:
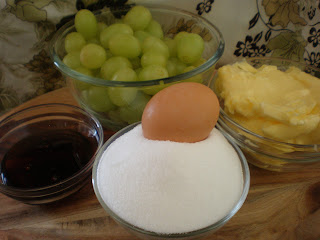
225g Butter or lactose free substitute
2 Tablespoons Golden Syrup
1 Egg
1 cup Sugar
450g seedless Grapes
2 cups Self Raising gluten free Flour
pinch of Salt
Bring the first 5 ingredients slowly to the boil
I muddled the egg before adding it, then kept stirring as it melted and boiled so as not to scramble it- yuck!
As it gets hotter, keep stirring or it will stick and start to caramelise on the bottom of the pan. Stir, stir, stir!
Pull the pan off the heat then add in the flour and salt.
Mix it through thoroughly making sure the grapes are well distributed
The mix will initially sort of foam up a bit before going kind of grainy looking, then as you continue mixing it will form a relatively stiff dough
Instead of making one larger cake in a 20cm or 8 inch pan, I chose to make individual ones in a 1 cup capacity pan. This batter was enough to make about 10 little lovelies this way.
I tried to make sure that the batter/dough was pressed down as I didn't want any gaps between the grapes from trapped air or in case they shrunk a bit as they cooked
I cooked these at 180*C for 30 to 35 minutes, or until a skewer comes out cleanly- just don't spear a grape! For a bigger pan the original recipe said to give them 35 to 45 minutes as I guess the mix would be spread quite a bit thinner than these smaller, taller ones.
I tried taking them out of the pan after about 10 minutes, but they were a bit delicate, slightly soft and a bit crumbly. Instead I left them to cool completely in the pan, and they firmed up just fine
I wasn't sure which side would make for the best presentation- top or bottom, so I tried both. The tops were a bit uneven as the dough isn't fluid enough to self level as it cooks, and the mix sunk a little around the grapes. The bottom had a lovely smooth finish to it and a more uniform look. It's up to you to choose :)
I really hadn't known quite what to expect with this particular recipe, but I was very happy with how it turned out indeed.
It was a lovely moist cake with a surprisingly nice flavour given the subtlety of the grapes, the golden syrup made it taste quite caramelised actually. The outside of the cake had a delicate crumbly feel, while the inside stayed nice and moist with little bursts of yum from the grapes. I wonder how it work with red ones instead?
If grapes aren't your thing, you could certainly use small chunks of apple or another firmer style fruit. I think softer ones would collapse quite a bit and maybe go a bit mushy.
It actually reminded me of my Strawberry Rhubarb Torte recipe, even though it wasn't boiled and the other one contained almond meal- go figure!
http://intolerantchef.blogspot.com.au/2012/02/strawberry-rhubarb-torte.html
So Dear Reader, do you have anyone in your family who has a legendary recipe or two?
February 14, 2013
Nice Cream

One of my gifts this Christmas was a wonderful Cuisinart Ice Cream Maker from BigJ
It has it's own compressor and everything, so there's no pre-freezing or mucking about and it can even make more than one batch in a row
After a couple of false starts or so, including sending it away for a replacement machine, we finally have it up and running and cranking out yummy lactose free treats

I'm having a great time trying out different flavour combinations and base mixes, but I also want to concentrate on healthier options that still taste as rich and yummy as their full fat, dairy contemporaries, and of course that are InTolerant friendly too.
I came up with this mix a couple of years ago when we were having some friends over for dinner, and whose little boy happens to be anaphylactic to dairy, gluten, eggs and nuts. I don't see any reason to cook two meals when one will do, so the whole meal was based on foods he could eat safely, without the use of an epi-pen.
He loved this dessert, and his Mum and Dad loved being able to relax and enjoy a night out- worry free. We decided to call it Nice Cream, because it was it's nice to allergies, nice to tummies, and nice to eat!
Three simple ingredients
600ml Coconut Cream
2 or 3 Ripe Bananas
5 Cardamom Pods
I used coconut milk, but I think coconut cream would have made a silkier mouth feel
Make sure you use nice ripe bananas for a lovely strong taste and natural sweetness
If you want to add some extra sweetness, a couple of tablespoons of brown or palm sugar should be enough

Give the cardamom pods a bit of a smash to make sure the little seeds are exposed and to release the flavour

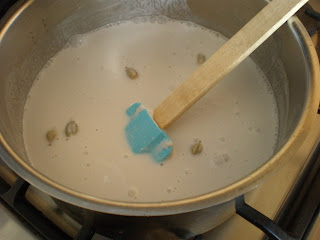
Pop the pods and the coconut cream in a saucepan and heat to a simmer. If you are adding any sugar, do it now and stir until it dissolves. Turn off the heat and allow to cool to room temperature and infuse.

Strain out the seeds and pods, their work here is done

Add two or three nice ripe bananas to the cooled mixture and blend it all up until smooth

For super smooth results you can also strain the mix through a fine sieve, but I don't really mind any little flecks of fruit or the odd lump or two

Pop the mix into an ice cream machine and churn according to the manufacturers instructions.
If you don't have one of these, then put it in a large bowl in the freezer and whisk vigorously from time to time as it freezes to break up the ice crystals and incorporate some air into the mix to make it lighter as well

Ready to scoop soft-serve, or pop in the freezer to firm up a little

Perfect smooth and lovely, healthy Nice Cream!

Scoop a lovely dome of deliciousness onto an allergy friendly cone (these ones are Eskal- but I bought an ice cream cone making kit, so stay tuned) and dig right in!
So Dear Readers, what's your favourite ice cream flavour, and do you like one scoop or two?

Other posts on iced treats you might like to check out:
http://intolerantchef.blogspot.com.au/2011/11/seasonal-cheer.html
http://intolerantchef.blogspot.com.au/2012/05/dark-chocolate-sorbet.html
http://intolerantchef.blogspot.com.au/2012/10/sublime-honey-sorbet.html
February 8, 2013
Hazelnut Sea Scallops with Vinegarette Dressing
It's still hot on this side of the world, well in my part anyway, and so light meals are still very much on the menu.
I found it necessary this week to quickly devise a lunch dish very much at the last minute that not only needed to taste great, but had to impress my visitor as well.
A quick look around my kitchen revealed bags of nut flour still sitting on my bench and I thought how it would be interesting to use it in a savoury dish too.
The nuttiness is such a great contrast to sweet meats and I didn't want to be stuck in the kitchen for very long, the perfect answer was Scallops. Such creamy, sweet soft flesh with just a moment in the pan, all that was needed was a touch of acidity for the perfect ladies luncheon indeed- yummo!
Scallops, about 3 per person
1/2 cup Hazelnut Flour
1 Shallot (much sweeter than onions)
tablespoon Butter or substitute
4 tablespoons Red Wine Vinegar
Seasoning
Dice about half the shallot as finely as you can, you want lovely little pieces that will cook in seconds. You only need about a teaspoon per person at the most
When presenting my scallops very simply like this, I prefer not to have the roe attached, but of course that's a personal choice and up to you to decide when you go to make your own dish.
Add a bit of seasoning to the hazelnut meal, then toss the scallops in it and make sure that they're thoroughly coated
Melt the butter on moderate heat, then cook the scallops carefully for only about a minute or so per side. You don't want to burn the nut flour coating but you do want it to develop a bit of a nice crust, so don't turn them over too early or the nut coating will come off and stick to the bottom of the pan
Remove the scallops from the pan and quickly toss in the diced shallot.
Stir it around for a minute until it's just starting to soften
Pour in the vinegar, swizzle the pan around a bit to mix it through, then pull off the heat and you're done!
I served the scallops drizzled with a bit of the dressing and with some little herb flowers from the garden. It would have been really nice to have a few chunky bits of roasted hazelnuts on the plate as well just to reinforce the nut theme and it would have provided a lovely textural contrast to the gorgeous creaminess of the scallop meat as well- but I just didn't think of it in time! The touch of vinegar gave these little nutty beauties the perfect lift they needed, and I sure think my friend was impressed with my quick last minute meal.
So Dear Readers, what did you have for lunch today and do you like the roe on or off your scallops?
Disclosure:
Nuts and Nut Flour supplied by Lario International - Thanks guys!
http://www.lario.com.au/nuts-hazelnut-flour-defatted-pariani-p-409.html?osCsid=449aa484f9fe5c78e0a1d20e841daa95
Subscribe to:
Comments (Atom)


