I have always considered myself quite a nice person. I like food of all shapes, flavours and colours. From every country and continent. I don’t discriminate, I am an equal opportunity eater. It’s only the doctors who say I’m intolerant. And certain foods who refuse to tolerate me. They certainly refuse to recognise and respect my right to eat them without major physical discomfort and distress.


Gluten and lactose are not my friends.


Despite the negative attitudes surrounding me from many of those I love best, (cakes, ice cream, hot toast) I decided to become a chef. Not always easy when you live in a bread and milk filled world. I like to think that this has helped me become a better person as I embrace my differences and refuse to let the gluten get me down. I believe InTolerance. I am the InTolerant Chef.

Food should not be about what you can’t eat, but what you can and what you enjoy eating. This blog is about my journey of cooking and eating and discovery. It’s not a definitive guide to allergy awareness nor do my intolerances make me an expert. Your body is your responsibility, not mine. I only know what works for me.


I can tell you this..... No glutens were harmed in the making of this website.

December 18, 2010

Date and Orange Cookies


These are one of my go-to recipes. I go-to them when I want something quick, I got-to them when I want something easy, and I go-to them when I want something delicious!

Again, I can't lay claim to this recipe, actually I think it's an old Woman's Weekly one, but no matter it's origins, it's fantastic.


Sometimes gluten free flour can taste a bit stronger than wheat flour, but in these biscuits the different flavour compliments the date and orange really well, and it's a plus not a minus.


When I take on catering jobs and there are dietary requirements, I usually make everything gluten/dairy/whatever free as it makes things easier to organise and there's less chance of cross contamination. If the numbers are really large though with just a couple of exemptions, I have a stash of doughs in the freezer that I can pull out and make fantastic free-froms at the drop of a hat. This dough freezes really well uncooked. With a firmer dough I pre portion so I can just take what I need, but this one is quite batter-ry and it can be frozen in small lots in zippy bags. Let it defrost completely before portioning and cooking.


The dough can be made completely in the food processor which is great to save on washing up. Don't forget to let the date mix cool properly though, or the mix will turn out like cake batter. If this happens, don't panic, let it cool down and then drop spoons of mix on the trays to bake.


The mix produces a soft cakey biscuit that is perfect for a quick dunking in tea or coffee. They are very sweet, and definitely NOT low GI- but I won't tell if you don't.
Date Biscuits
2 cups of dried dates
2/3 cup of golden syrup
2/3 cup of water
1/2 tsp bicarb. soda
2 tsp grated orange rind
500g plain gluten free flour
1 1/2 cups castor sugar
200g dairy free margarine
2 eggs
Put dates, water and syrup in saucepan and bring to a boil. Add the bicarb soda and orange rind, stir and let cool.
Put into bowl of food processor and pulse until fairly smooth.
Add in the rest of the ingredients and pulse until it's a nice smooth batter.
I like to let the batter rest for about 1/2 an hour as I find it firms up a bit in this time.

Place tablespoons of mixture on baking paper lined trays, allowing plenty of room for spreading.
Bake at 180* for 15-20 minutes. Let them cool on the trays until firm enough to place on cooling racks.
Brew a nice cup of tea or coffee, and prepare to dunk away!
So Readers, what is your favourite go-to recipe?


December 11, 2010

Cherry Christmas!


Have yourself a Cherry little Christmas!

Today at our lovely farmers markets we were inundated with choices of cherries. Here in Canberra we are quite close to Young, the cherry growing capital of Australia, and so I guess we get first bite of the cherry when it comes to shopping. There were bright red ones, light red ones, yellowy ones, my favourite deep burgundy ones, graded ones in gift boxes, and seconds piled in mounds on tables. I got these absolute beauties at the incredible price of $5 a kilo! And they were very generous kilos I might add. I realised I should make the most of this season bounty as the recent rains and floods have wrecked havoc with local crops and this could be all we can get this year.

As always the hardest part of any cooking process is deciding what to cook.... So many delicious options.... In the end I chose Cherry Clafoutis, a classic French dessert that is a kind of hybrid tart or flan with a custard base. Obviously a perfect choice for gluten free cooking! MiddleC is an absolute fracophile after studying it for 6 years and so I am dedicating this recipe to her and her French email buddy who lives in Provence. I call her MiddleC's imaginary friend as their relationship is computer based and they aren't likely to meet in the near future, but the good thing about technology is that they are closer and are in contact more than many of her 'real' friends.

According to Wikkipedia, a traditional clafoutis is made with the cherries whole and unpitted as this intensifies the flavour. So, this is my official reason for doing so, not because I couldn't find my cherry/olive pitter at all. After all,who am I to mess with tradition?


I actually based this recipe on one I read in the local newspaper when they interviewed the wife of the French Ambassador. When I researched further, I decided that with it's lower sugar content it was a good choice for me and my insulin levels and hopefully my waistline,even though I did use cream- low fat of course!

Cheery Clafoutis

750g cherries

100g gluten free flour

1/2 tsp gfree baking powder

6 small eggs

125 grm sugar

1 vanilla pod,seeds scraped

nice pinch of salt

25grm melted butter

250 grm lactose free cream - or dairy free milk equivalent


1. Beat the eggs in a mixing bowl for about 5 minutes or until they have tripled in size.

2. Add in the sugar and vanilla seeds and beat for another 5 minutes.


3. Sift in the flour, salt and baking powder and fold in carefully so as not to knock out the fluffiness. * I use this great spoon with a hole in it for careful mixing. It works great for folding ingredients together gently, but I don't remember where it came from sorry.


4. Slowly add in the melted butter and cream, pouring it down the side of the dish, again so it keeps the air incorporated.

5. Place the cherries in the bottom of a greased dish- pitted or not, I will leave to your discretion. And carefully pour the batter mixture over.

6. Bake at 180* for about 45 mins, the clafoutis should be puffed slightly, set and browned around the edges.

7. Dust with icing sugar and serve still warm. With or without cream, again, I leave it to your discretion, but I know what I would do.

I realised my clafoutis was baked in a dish that was a bit too deep, next time I'll drop the temperature to about 160 and bake for a bit longer. Or I could just bake it in a shallower dish as I should have in the first place!


So dear Readers, what is your ultimate Christmas fruit?


P.S. The winner of the giveaway is.... drumroll please ...... Eagles 17, I couldn't find any details for you though, so please contact me ASAP so you get your goodies before Christmas.

December 1, 2010

Crumpets


I miss Crumpets.

I know it's not a big thing, but the way the melted butter would collect in those little funnels then drip down my fingers, was really quite sublime.
Although it's the start of summer, after days and days and days of rain, it's a tad cool and leaves me wanting a warm breakfast instead of my muesli.

I took my start from an old Delicious magazine with a basic sounding crumpet recipe, but knew it would need tweaking. I faithfully followed the instructions, then stood back to think..... definitely more liquid needed. Oh, that's not gonna work like that! A little change here, a little change there, 3 attempts of cooking style later and, Voila! Crumpets!


Now, we all know that gluten free products can be, shall we say, 'lacking' that certain something that their glutenous cousins take for granted, but these are actually pretty good. The little funnels formed well and held the all important butter, they baked well, and they toasted beautifully. I always like my crumpets a bit over toasted and this wasn't a problem either. Win win for us InTolerants.


Originally the recipe frys the batter in egg rings, but this was disastrous with the gfree mix. The batter overcooked on the base, and set on top before they were cooked through in the middle. I tried cooking them on a lower heat, but they turned into hard little frisbees that would pose a danger to dental work. I tried a flatter more piklety stlye, but that wasn't much better. In desperation I baked them in the oven. At first I was dubious, I couldn't see any little funnels, but before I threw them to the dog,I cut one in half. Perfection! There were my funnels ready to be filled with buttery goodness. I toasted one straight away and was impressed. I left the cut piece out overnight and toasted it this morning and was more impressed! I think drying it out overnight helped it crispen up. I used texas muffin pans which made a very cute little shape, but the emphasis is on little. I can fit 2 pieces side by side in my normal size toaster. I can't really say how many this mix will make, because I tried so many different ways before I got it right, that I only had enough batter left for 4 little babies, which I cut into 8. Not nearly enough for crumpety cravings. I guess I'll be making more this weekend!


Ingredients:

3 cups gfree flour
7g dried yeast
300ml lactose free milk or dairy alternative
500ml warm water
pinch of sugar

Mix the flour, yeast and sugar in a large bowl.

Add the warm water and milk. Mix well.

Cover and place in a warm spot for an hour for the yeast to do it's thing. Batter should double in size.

Grease some Texas muffin pans and half fill with batter. Don't knock out the airiness of the mix.

Bake at 180* for 20mins.

Turn out and let cool.

Cut in half and toast.

Slather with butter and honey and enjoy!

So Readers, what do you like to put on your crumpets?


P.S As promised I have my first giveaway! When I recently renewed a magazine subscription I received a lovely gift of a Junior Master Chef rice kit. Although I have my own junior master chef, I also have nearly every kitchen appliance known to man. All my nieces and nephews are too old or too young, so I have decided to re-gift it to one of you. (brand new in wrapper of course) To be eligible just comment on this post with the name of your little master chef that you will be re-gifting the re-gift to for Christmas.
Good luck!

November 25, 2010

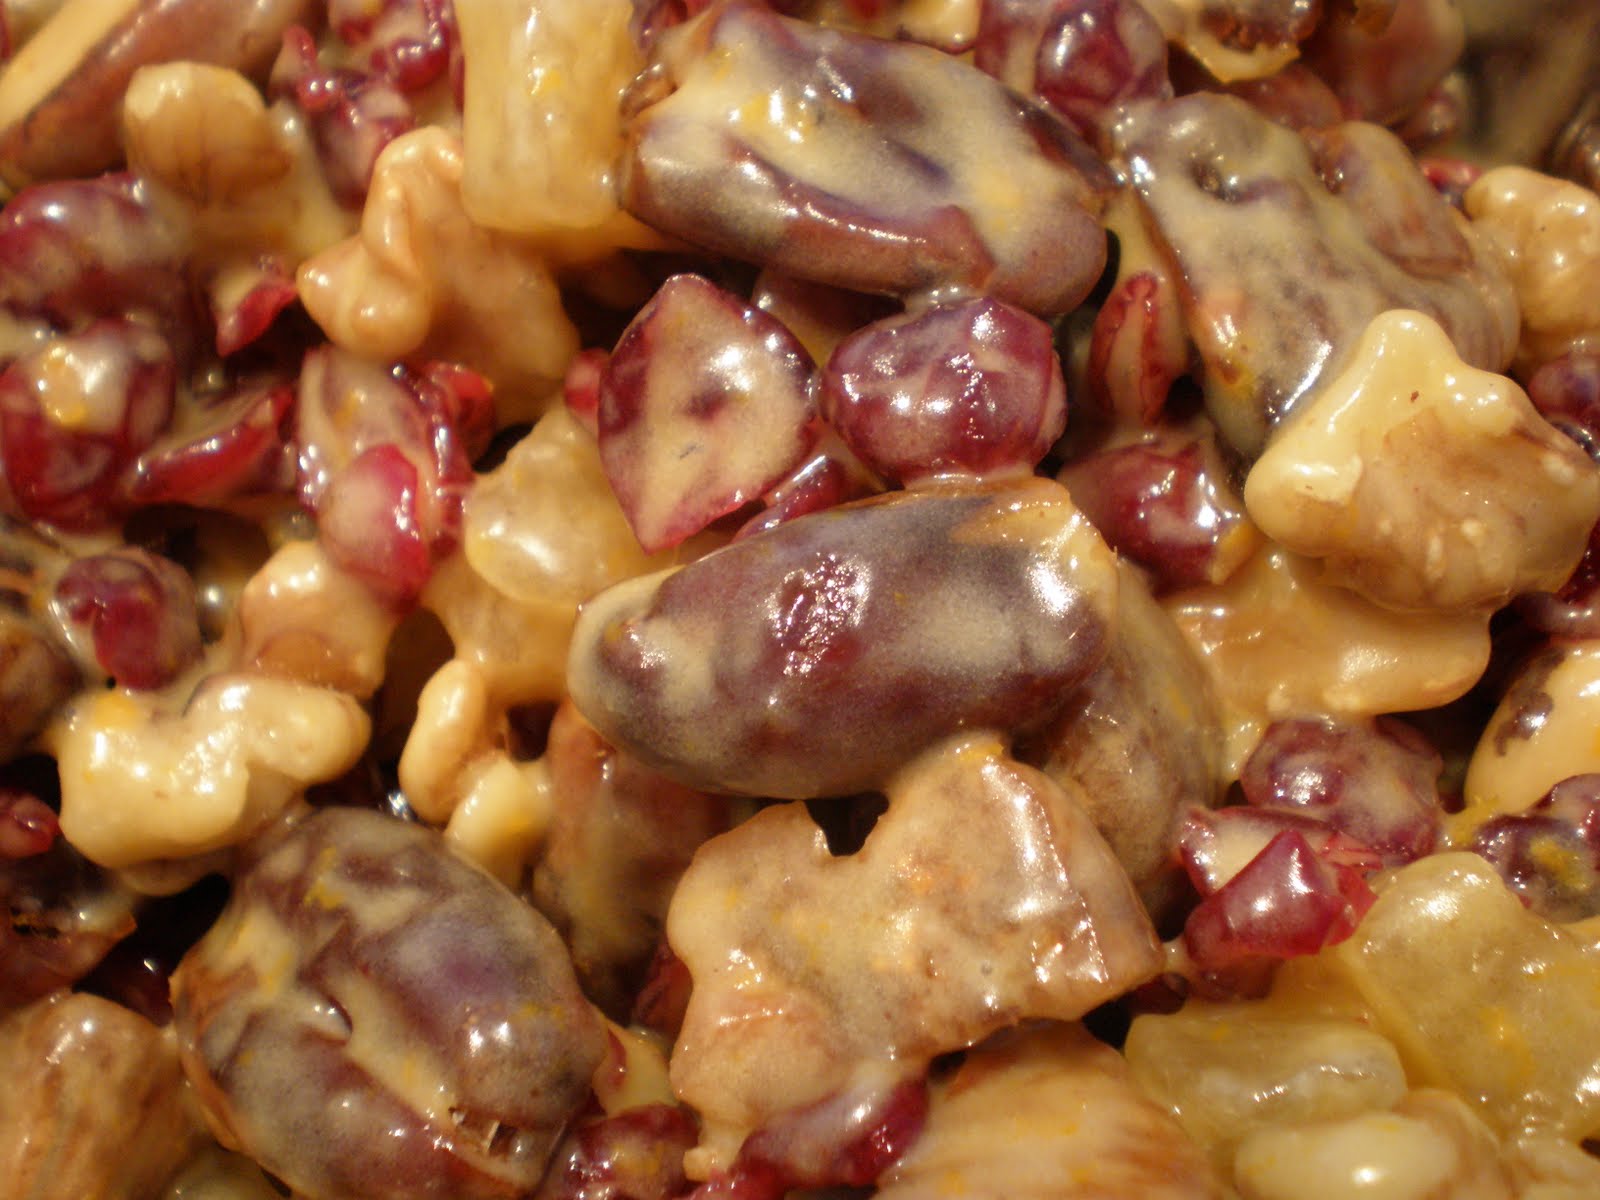
Fruit and Nut Loaf


One of the fun things about my job is developing new recipes.

Well, really, there's no such thing. Unless you work at Noma, El Bulli or Fat Duck or in one of the magical molecular kitchens,that is. When I'm looking for something new, I have a bit of an idea in mind,then start delving deep into my resources - cookbooks, magazines, favorite food blogs and Google. I brainstorm and scribble little notes to myself in notebooks and even sketch out stick figure type drawings of how I want it to look and be plated. I take elements of many recipes and slowly piece them together a bit like Frankenstein's Monster cobbled together from many sources, until it resembles most the idea rattling around in my head.


This month we wanted to revamp the Cheese Platter dessert option. Well, really, there's not much you can do with chunks of cheese on a plate. No matter how delicious they are. We want the integrity of the cheese to remain, so it's all about 'Accessorising'


Anyone can do crackers; fresh crispy type fruit is a given; so we decided to go for a fruit and nut loaf. I based the idea on the good old Stained Glass Window Cake. This is made up of different types of glace fruits and nuts held together with a very minimal amount of batter to cement it.


The original recipe of glace fruits would be way to sweet and overpower the delicateness of the cheese, so I chose different types of dried fruits to compliment them instead. There were a couple of types of nuts and just a little orange zest for that special little something extra.


Ingredients:


175g cranberries


175g dates


175g plump style dried figs


175g naked ginger- crystallised but not rolled in sugar


175g of mixed nuts- I used Brazil and walnut, but will change to almond and macadamia


1/3 cup gluten free plain flour


1/4 tsp gluten free baking powder


2 tablespoons castor sugar


2 tsp grated orange rind


40g of melted butter


2 eggs


Roughly chop the figs and dates


Mix the eggs, sugar, rind and butter


Add in the flour and baking powder


Mix in the fruit and nuts


Tip into a lined loaf tin and press down hard to compress


Bake at 150* for 90 minutes


Let the cake cool in the tin and preferably leave overnight before cutting, to avoid it breaking into pieces. When you do cut it, use a sharp serrated knife and saw through carefully as the fruit may be a bit sticky.


Serve this as part of a cheese platter, or enjoy it with a cup of Earl Grey tea.


If you want to make this as an alternative Christmas Cake, just use a selection of glace fruits instead, and maybe a dash of rum or brandy. While the cake is still fresh and ht from the oven, brush it generously with the rum or brandy so it sucks up even more festive cheer!


Now an update on BigJ... the good news is that the surgeon was able to reattach the severed finger and we expect a full recovery with free range of feeling and movement! The bad news is that this, of course, takes time. It will be at least 3 months before things are even remotely back to normal. He will have keep it dressed and splinted for most of that time, and really be careful. He is managing to get back to work and even do a modified style of typing.


This is littlej's solution to the problem.
Isn't she a subtle, sensitive soul?


So Readers, what do you like on a Cheese Platter?

November 17, 2010

Get Some Mork's On Your Fork


I love Thai food.

If I could only have one cuisine to live on for the rest of my life, I think I would choose Thai. It just has it all; warming curries, cool salads, all the taste ticklers-sweet salty sour and hot, rice not nasty gluten based. Really, what's not to love.


I have numerous books on the subject of Thai food, I have done my due diligence in researching the local take on Thai cuisine (with varying degrees of yumminess), I have attended the Thai Embassy and Thai Temple open days and food fairs, etc etc etc

But... If you are interested in something you may as well learn from the master. With this in mind, I have recently been attending some Thai cookery classes at icook culiary college, Mawson, led by Mork, from Morks restaurant in Florey.

Despite my love of Thai cusine, I wouldn't have been tempted to spend this amount of money on 4 classes if the teacher hadn't been Mork. He is a lovely, engaging young guy who really knows his stuff. His family has run their own restaurant for many years before opening Morks, which has a bit more of a contemporary twist and is more up scale than the usual neighbourhood place.


BigJ and I love the food at Morks. I even wrote a post with a review of their fantastic food, but somehow there were no photos to put with it! So when I saw these classes advertised in the Canberra Institute of Technology short courses, I knew I wanted to go.


The classes covered a wide variety of tastes and recipes including many I'd never experienced before. We did pastes and salads, tofu and meat, veggies and desserts- yumm! All ingredients were covered in the price, and we all sat down together for a communal meal at the end of each class and even shared a glass of wine or two!


This is a very simple recipe that was one of my favourites from the classes. It's not complex like the curries, or zingy fresh like the salads, but the smooth silkiness of the eggplant coupled with the chilli was delicious and I thought I'd share it with you.


Grilled Eggplant with a Chilli Paste Dressing

1 Tbsp Chilli paste with soybean oil
- we used the Pantainorasingh brand

3 Tbsp lemon or lime juice

3 Tbsp fish sauce

1 Eggplant sliced lengthways

1 Tablespoon of fried asian shallots

1 Bunch of corriander


Grill the eggplant in a little oil until soft and caramelised.


Combine lemon juice, fish sauce, and chilli paste until well mixed


Arrange eggplant on plate and dress with sauce.


Chop corriander aand sprinkle over dish.


Garnish with the fried shallots and serve.


This has been a hetic week for us here, hence the lateness of this post. BigJ amputated his top finger joint on the weekend, and after several days in hospital, surgery and many medications later, we are back home and everything is looking hopeful, thank God, because it could have been much worse. Lets just say that the next time he uses a power tool, the dog will be tied up securely out of the way. I can say that I have never driven so fast in my life, but thankfully no policemen were inbetween me and the hospital, because I really don't think I would have stopped for anything. littlej also heard many interesting words for the first time, and we can but hope they aren't seared in her memory forever!


So Readers, what would you risk a speeding ticket for?


November 7, 2010

Gluten Free Chocolate Chip Peanut Butter Cookies


This is not really a recipe, it's more like alchemy.


Taking raw ingredients, combining them just so, and having them almost magically convert into something amazing! I'm not to sure how the magic works, every time I make them I'm sure I'm missing an important bit.. but they just work. Every time.

Beautiful Celia, from Fig Jam and Lime Cordial, sent me this recipe. She had posted a yummy 'normal' cookie recipe on her blog, then kindly sent me a gluten free alternative. What a sweetie to think of us InTolerants like that! Here is the link to her original post:
http://figjamandlimecordial.com/2009/03/23/gluten-free-chocolate-chip-cookies/


This has simply got to be the easiest recipe ever. Only a few ingredients that you have in your pantry anyway, only one bowl, not much mixing or stirring, and only 15minutes away from yummy deliciousness. Win win. In fact, these are so easy that littlej is now the designated PBcookie maker as they are almost an insult to cooking. Remember I told you they are not cooking, they're magic.

Here are the ingredients for 2 dozen decent sized cookies:

1 cup of peanut butter
1 cup of packed brown sugar
1 cup of chocolate chips - I use dark chocolate to be lactose free
1 egg
1 tsp of baking powder
1/2 tsp of vanilla essence

Now Celia recommends Sanitarium natural peanut butter, but this week Kraft was on special for only $2, so this is what we used.

Mix everything together, adding the chocolate last. That's it. Nothing else. Told you it was magic didn't I?

Place a heaped tablespoon of mixture in nice little balls on a baking paper covered cookie sheet. Allow a couple of centimetres between each for spreading.


Put in the oven at 175* for 10-12 minutes and wait for the magic to happen. The cookies will spread out and puff up. They will turn a lovely golden brown, but watch them carefully as they can burn easily. Once you pull these out of the oven they will still be really soft, almost squidgy- but they will harden up nicely when they cool down.


Are you sure these don't have any flour in them, even gfree flour? They look like they do, they taste like they do, no one will believe that they don't. See what I mean by magic?


They also magically disappear.


Now these are great still warm from the oven -after they've set, fantastic for a snack or with a cup of tea, but absolutely amazing for dessert as ice cream sandwiches! We put a big scoop of vanilla icecream between 2 cookies (I think chocolate icecream would be good too) and served them to guests. They had no idea that they were gluten free, or that this was the first time I'd ever made this recipe. They just knew that they were yummy, and kind of magic. The children were magically quiet for about 10 minutes, and smiles magically appeared on the grown ups faces, and everyone was happy. That's a magic moment worth repeating for sure.

Thanks Celia.


So Readers, do you have a magic recipe?