I have always considered myself quite a nice person. I like food of all shapes, flavours and colours. From every country and continent. I don’t discriminate, I am an equal opportunity eater. It’s only the doctors who say I’m intolerant. And certain foods who refuse to tolerate me. They certainly refuse to recognise and respect my right to eat them without major physical discomfort and distress.


Gluten and lactose are not my friends.


Despite the negative attitudes surrounding me from many of those I love best, (cakes, ice cream, hot toast) I decided to become a chef. Not always easy when you live in a bread and milk filled world. I like to think that this has helped me become a better person as I embrace my differences and refuse to let the gluten get me down. I believe InTolerance. I am the InTolerant Chef.

Food should not be about what you can’t eat, but what you can and what you enjoy eating. This blog is about my journey of cooking and eating and discovery. It’s not a definitive guide to allergy awareness nor do my intolerances make me an expert. Your body is your responsibility, not mine. I only know what works for me.


I can tell you this..... No glutens were harmed in the making of this website.

Showing posts with label gluten free dessert. Show all posts

July 1, 2014

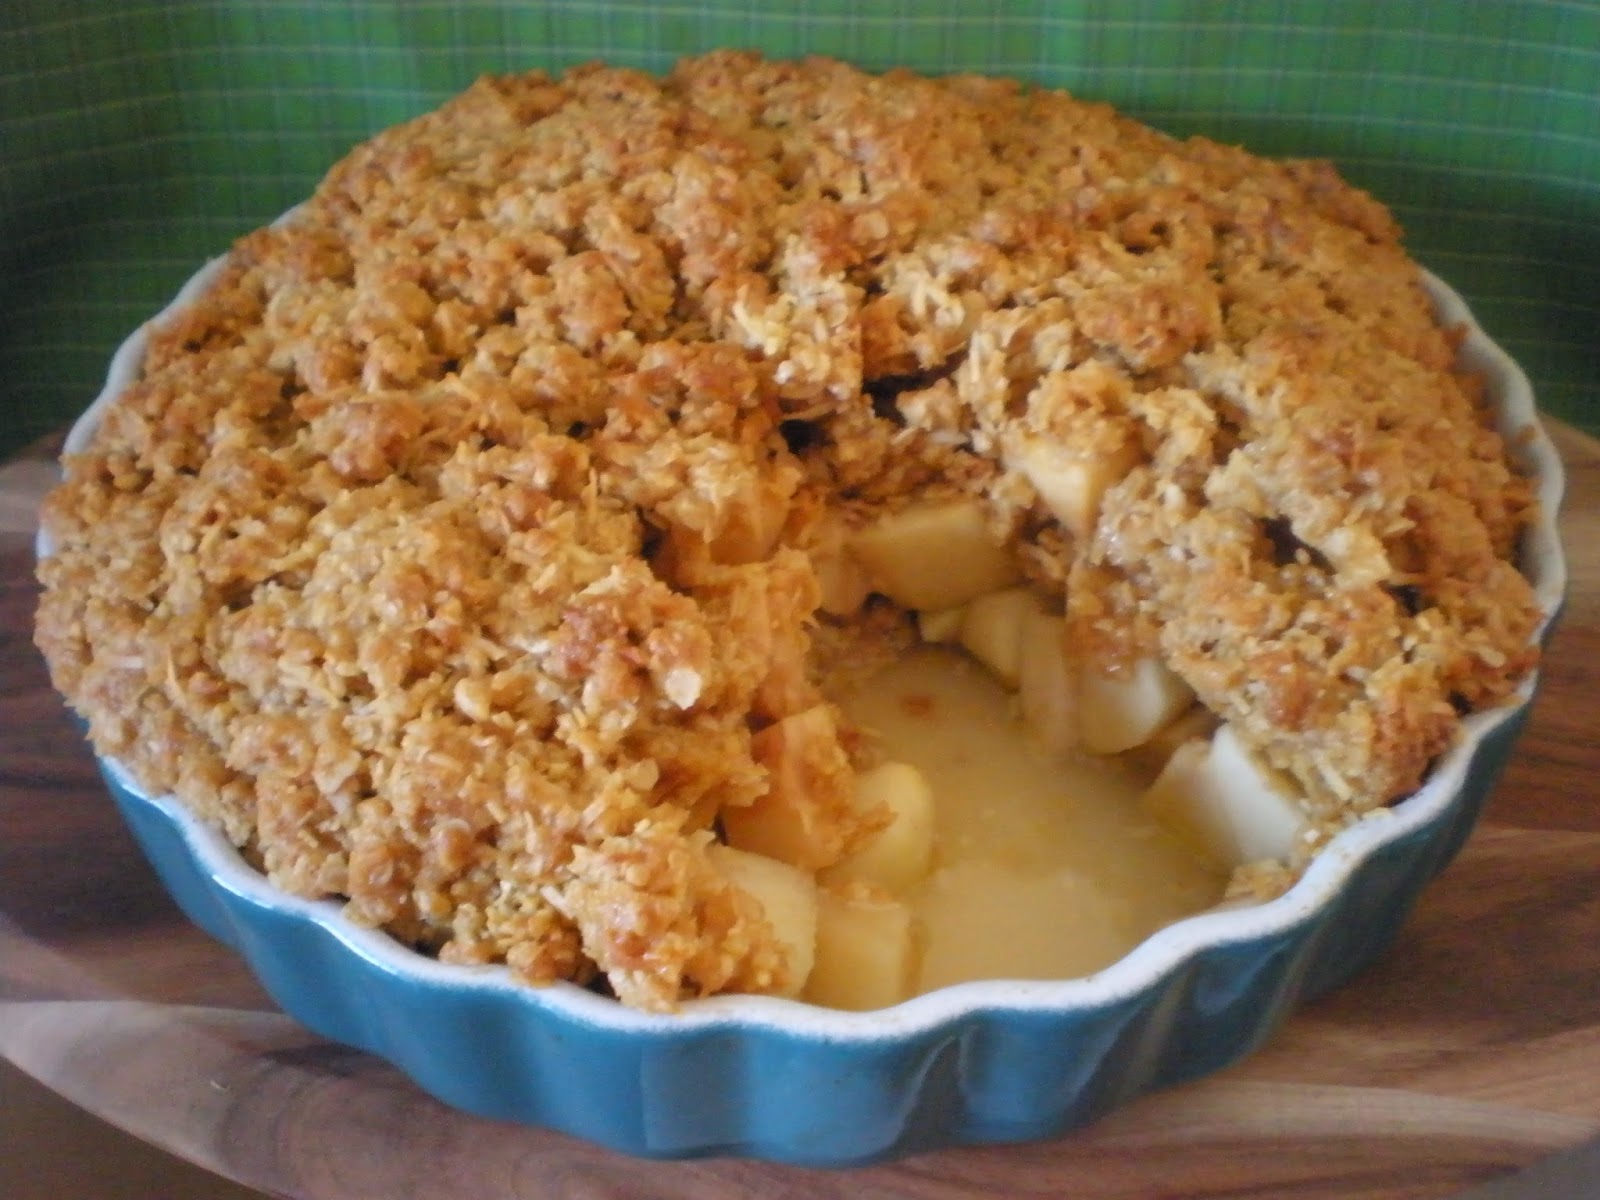
Anzac Apple Crumble


It's past the Winter Solstice- the shortest day of the year


This means that the weather gets colder, the snow on the mountains creeps lower, and it's definitely time for comfort food


Apples have been a ridiculous price lately, only 99c per Kilo, so when I staggered in with about 5 kilos the other day MiddleC and littlej both screamed "Apple Crumble!" After a brief negotiation over who would peel that many apples, I agreed


I always use coconut in my crumble recipe, I think it adds a lot of crunch and texture, and the addition of gf oats really does make it taste like a traditional Anzac Biscuit recipe. So despite it being July instead of April 25th, here we have one of my Family's Comfort Food Favourites- Anzac Apple Crumble!


Yummy Topping Ingredients


Anzac Apple Crumble

Whole heap of Apples
1 cup gf Oats
1 cup shredded Coconut
1/2 cup gf Flour
1/2 cup Sugar
1/2 cup melted Butter
1/4 cup Golden Syrup
big pinch Salt


Peel and chop your apples into nice big chunks. If you chop them too small they'll just break down into mushiness


Pop them into a fairly shallow greased dish


Mix together everything else


The best way to do this is to use your hands and squish, squish, squish away


Pat the crumble topping evenly over the apples- make sure it's not too loose but fairly nice and compact


Bake at 170*C for between 45 mins and an hour, or until the topping is nicely browned and cooked through and the apples are softened inside


Let the crumble sit for about 15minutes or so to set the topping


Dish up lovely big spoonfuls and serve with lots of lovely lactose free cream, ice cream or custard


Gorgeous crunchy topping, soft juicy apples, softly smooth cream.... yummo!


So Dear Readers, do you have a Family Favourite dessert, and how are you keeping warm this Winter?


August 20, 2013

Summer Dreams... Basil and Peach Chiffon Cake


Once upon a time.... a long, long while ago, there was warmth in the land

It was a time of rejoicing, of long days and weekend barbecues, stone fruit and salads...

It was known as Summer.

Today Summer seems very, very far away still with snow on our local hills and bitter, icy winds whipping around the windows and cutting through you to your very marrow when you're silly enough to go outside. I have been seeing subtle changes though, like shy blossoms starting to colour on the trees, and wattle wattling furiously along the roadsides, but it wasn't until I came across some imported Summer Peaches at the supermarket that I realised how much I was pining for warmer weather.

Now I grow a LOT of our own veggies, and I'm a great believer in eating locally and definitely supporting Australian farmers rather than overseas producers for fresh, tinned or frozen goodies - but I couldn't help it...they sat there glowing with red and gold, just like a sun kissed cheek and somehow a few of them ended up in my shopping trolley.

It would be wrong not to eat them now, wouldn't it?

Another great Summer love of mine is Basil. You can get it year round, but in the middle of Summer it grows prolifically in my herb garden and when I go outside the smell is so strong that it's glorious indeed. How about pairing the two ingredients for a taste of Summer? Something light as a change from heavy Winter comfort foods, something dreamy.... Basil and Peach Chiffon Cake
sounds just right!


Basil Chiffon Cake

180gm gf SR Flour
200gm Castor Sugar
8 Eggs
125ml Basil Juice or Water
125ml Oil - or Basil flavoured oil
1 tsp gf Baking Powder

3 Peaches

Syrup:
1 cup Castor Sugar
1 cup Water
1/2 bunch Basil

Cream
whipped with two tablespoons of basil juice or basil flavoured oil, and two teaspoons of castor sugar


Now my first challenge was to get the true flavour of Basil somehow. Just blitzing it up would work ok, but I wanted something a bit more refined than that so I decided to use my cold press juicer and managed to extract this much juice from a standard bunch of basil. There's also a great Basil oil available from Coles and Woolies that I thought of afterwards that I'll use next time as well. Care is key here, you don't want a cake that tastes like pesto!


Separate your eggs, be really careful to keep them clean and not let any yolk get into the whites or the cake won't work


Beat the egg whites with 100gms of the  sugar until stiff peaks form


In another bowl, whip the egg yolks with the other 100gm of sugar until nice and fluffy and ribbons remain on the surface when you dribble the mixture


Now beat in the water/juice and oil into the yolk mix until well combined


Mix in the sifted flour and baking powder, and stir into a lovely green tinted batter


Beat in a good spoonful of the eggwhites to lighten up the batter and loosen it up a little, then carefully fold through the rest of the whites. You want to keep in as much of the air bubbles as possible for a lovely light-as-a-dream finished cake


I wanted to make two small cakes instead of one regular sized one, so I split my mixture into two 18cm cake tins, but one larger one would be lovely,
DON'T grease the cake pans though. Even a using Non non-stick ones are better as Chiffon cake batter is similar to an Angel cake mix and uses the sides of the pan to cling to as it rises. If you only have coated pans like me, just make sure they are really clean with no greasy residue inside and you should be OK
Bake the cakes at 170*C for about 50-60 minutes until they spring back slightly when touched on top, don't prick these ones with a skewer to check as they can be a bit touchy


Now while your little cakies are in the oven, let's crack on with the Basil Syrup
Mix the sugar and water together in a pan, add in the basil, then simmer until the mix is slightly reduced and syrupy- easy peasy. Let it cool


Peach fuzz isn't the best texture in a cake, so peel them by blanching them in boiling water for a minute than peeling off the skin slowly, or just use a regular veggie peeler. I wanted to keep the blush on the flesh so I used the water method and went nice and slow.


Pop the sliced peaches into the basil syrup and let them mingle their yummy flavours while you bake and cook the cakes. You can do this step a day before if you like for a taste that's a bit more intense


Once the cake is cooked, cool it on a raised rack with the tin upside down. Chiffon cake is really like a cross between an Angel cake and a Sponge, but treat it more like Angel cake for the best results


Once cooled completely, split the cake into layers and give them a brush with some of the basil syrup for a sweet hit


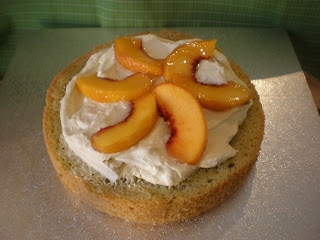
On the bottom layer, plop on some cream, then top with some peach slices. I don't like to take my cream layer to the edge of the cake as it will squish out when cutting and look messy


On the top layer, take a very small amount of cream and spread a thin layer over the entire split surface. This ensures it doesn't dry out, and helps the top layer stick to the peaches underneath without slipping around


Put the layers together then decorate the top of the cake with more cream and those sunny slices of peach


I really was so happy with this cake, and it certainly delivered my Summer Dream. The basil flavour was subtle and spicy, and didn't come across as savoury at all, the peaches were plump and juicy and despite their long journey hadn't forgotten their sweetness, and the cake was soft and fluffy....just like a dream indeed.....


So Dearest Readers, what is your Summer Dream and your favourite taste of Summer?


November 20, 2012

Christmassy Cherry Cobbler


Cherries and Christmas just go hand-in-hand for me


The weather is warming, the carols are playing, and stone fruit is on the market shelves. Definitely Christmassy, and cherries are even such a lovely seasonal colour!

Here in Canberra, with our proximity to the great cherry orchards at Young, we can't seem to go down any main arterial road without coming across a cherry van pulled off to the side offering kilos or boxes of fantastically fresh cherries.
I got mine from a great character who even threw in free pit-spit bags so I could snack as I drove :) A bit trickier to master than he had made it sound!


Now cherries don't keep all that long, so despite highway nibbling, and school lunches, there was still quite a pile that I needed to use up. After a bit of a think, I went for something a bit different and decided to make a Cherry Cobbler.

Cobblers are quite an old, traditional pudding that apparently came about in colonial times due to difficulty finding the right ingredients and equipment to make the usual boiled type puddings. Instead of being enclosed or having a base like a pie, in a Cobbler a stewed fruit filling is covered with a type of dumpling dropped on top, so that when it's cooked it joins up and gives an old fashioned cobbled street effect.

I like food that looks pretty as well as tasting good, so a rustic Cherry Cobbler seemed to fit the bill, as well as involving a lot less hand work making and rolling out pastry for me. Win win, I say :)


Now the first job is to pit the cherries.

You could leave them whole, but that can cause a few issues like broken fillings or choking, so it's probably just easier to get the job done and have a clear conscience.
I used my nifty little pitter tool. You stick the cherry in one end, then press the little sticky bit down and it pushes the pit out the cherry while leaving it whole. Just to be sure and wear an apron though as it can get a bit messy if your cherries are nice and fresh and juicy like mine


Filling ingredients:

Cherries- I used a good kilo or so
Liquid, about a third to half a cup. It's not meant to be too runny- you could use water, juice, port, wine, but I used a Sour Cherry Syrup from my local deli
Sugar- about a cup or to taste
Vanilla Bean
1 tablespoon or so Arrowroot powder


Pop the cherries in a pan with sugar to taste, the split and scraped vanilla bean, and the liquid.
Cook gently until the cherries are cooked and tender, but still maintaining their shape


Make a slurry out of a tablespoon of arrowroot and some cold water.
I like arrowroot for this type of thickening as it doesn't colour the finished product. It also sets to a gel type effect that works great in acidic fruit pie fillings, but can be a bit goopy in a meat dish though. It also freezes fantastically without breaking down later.


See, gelling up nicely. It sets pretty much immediately, so stir as you go and only add a little at a time


Pop the filling into a greased pie dish


Now for the topping

This was perhaps more muffin-y than dumpling, but if you like you can replace the oil with butter or other solid fat, rub it into the flour, then add the liquids and make it more of a scone type dough


2 cups SR gluten free Flour
3/4 cup castor Sugar
1 cup lactose free Milk (or dairy free substitute)
1/4 cup Oil
1 Egg
2 tsp Vanilla
pinch of Salt


Mix the flour, sugar and salt in a large bowl.
I don't bother to sift them, but I do stir them around a bit with the whisk to mix together and lighten it up a bit as well


Whisk together the milk, oil, egg and vanilla


Pour the wet mix into the dry mix, and stir through gently being careful not to overwork the batter


Dollop spoonful of the mix over the fruit base. The topping will expand as it cooks and join up a bit in a nice random fashion.
I also sprinkled mine with some large coffee-style sugar crystals to add some nice textural contrast to the finished dish


Lovely squishy bottom with the top ready to bake
Pop it into the oven at 200*C for about 25-35 minutes, depending on how thick you've dolloped on the topping. You want it cooked through with no raw batter underneath


And see? Just like Cobblestones!
A lovely fluffy cobbler topping with the crunch of sugar and rich ooziness of the cherry filling..... Mmmmmm....... vanilla, caramelised sugars, cherry tartness- it all smells divine indeed


A big spoon full of Cherry Cobbler, with maybe a drizzle of lactose free custard or a scoop of creamy lactose free ice cream is just what I need to get me in the mood for Christmas!


So Dear Readers, are you getting in the mood for Christmas, and what's your favourite cherry dish?


.

November 13, 2012

Blue-Belt Blueberry Lemon Muffins


When littlej was in her very first week of Kindy (Prep) she came rushing out of class one afternoon bursting with news.

lj: I had a FIGHT!

Me: ????

lj: ThisbigboyhadKaitlinroundtheneckandshewascryingandherippedherdressandIcouldn'tseeateacher.....soIhithim!

Me: Then what happened?

lj: Nothing, so I kept hitting him

Me: And then what happened?

lj: I kept hitting him until he fell down

Me: Then what did you do?

lj: Then I ran

Me: I think that was a very wise decision

Littlej was a very tiny 5year old, and the boy in question was a (comparatively) huge hulking 9 or 10yr old, but that wasn't going to stop her defending her friend. Her teacher had a little chat with me, assuring me it was all under control, parents had been notified and not to be concerned.
As littlej wasn't worried I decided I wouldn't be either.
That was until Kaitlin's Mummy talked to me.
She and the other parents had been summoned to the principals office, along with any witnesses; apologies had been made, restitution for the torn dress was made, suspension had been given, and reports had all officially been made.... Except for littlej.

Littlej had certainly been involved, would she get suspended too? My baby with this on her permanent record at the very start of her school career!
I went to her teacher, who was just lovely, and she explained that this was indeed a bit of a tricky situation.

Littlej certainly had struck another student (repeatedly), but it was in defence of her friend; he was much bigger; there was no teacher present; it wasn't behaviour the school thought she was in the habit of committing; and if the school recognised her part in this little action she would have to be suspended and punished indeed. The big boy was a known bully; it probably did him good to be taken down a peg or two, and he was unlikely to go looking for revenge once his friends found out he had his butt kicked by a kinder student; the teachers were actually impressed with littlej's bravery; and the best course of action was to pretend she hadn't been involved at all.
That was the Official School Decision.


Littlej has never looked back.
She is a lovely little lady- very clever, very confident... and she also now takes karate.

This week she recieved her Blue Belt. We don't condone violence as a general rule, but it's always a good idea to know how to defend ourselves- or our friends :) if necessary. That's a good thing.


littlej's Metalwork candlestick project


Littlej was called in to see one of her teachers this week.

You see, it's the time of year when selections are made for next year classes, and students are asked to give in their preferences for electives. Littlej had chosen Metal Work (shop) class and her male teacher was concerned. He nicely explained that his regular students were mainly boys, and not ones who were in her academically fast-tracked classes, but ones who may misbehave from time to time (he used the word Miscreants), and was she sure this was the class for her?

Littlej said she just smiled at him, and said : That's OK Sir, I don't think I have anything to worry about.

You see, it's not about violence, it's about confidence.


In celebration of littlej's Blue Belt, I made her some Blueberry Lemon Muffins


They're kind of like littlej- muffins are sweet and cute but have a bit of substance as well. Not just pretty and precious like a cupcake :)


3 cups gluten free Self Raising Flour (or plain flour and baking powder)
2 1/2 cup lactose free Milk, or dairy free alternative
2/3 cup Sugar
2 Eggs
1/4 cup Oil
pinch of Salt


cupful or so of Blueberries
2 big tablespoons Lemon Curd (yes I know homemade is better, but this was handy)
Lemon Zest


In one big bowl, mix the flour (baking powder if using), salt and sugar


In a different bowl, whisk together milk, eggs, and oil


Add the wet mix into the dry along with the lemon zest, curd and blueberries


Gently mix together. Don't beat it too hard or the muffins won't be nice and tender, a few lumpy bits are just fine


Pop the mix into muffin pans, and if you want a bit of gratuitous yumminess, top with a little dob of extra lemon curd.
I used 1/4 cup of mix each and made 2 dozen little lovelies


Bake at about 200*C for 20 minutes, leave in the pan for about 5 minutes then place them on a rack to cool down totally


Delicious! But please don't jump in while still piping hot or the lemon curd will melt your mouth off, the sugar heats to lava temperature!


So Dear Readers, did you take Self-Defence classes when you were younger, and what are your tips for self-confidence?


.